D3.js v4/v5 範囲選択 (d3.brush) 使い方 – タッチパネル対応
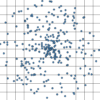
D3の範囲選択の使い方を紹介します。範囲選択の基本的な使い方はこちらで紹介しましたが、タッチパネルに対応する場合はこのサンプルのように変更すると使いやすくなります。グラフ上をタッチしてください。こちらのサンプルとは違い、タッチしたところに範囲選択が移動します。
サンプルデモ
サンプルプログラム
|
1 2 3 4 5 6 7 8 9 10 11 12 13 14 15 16 17 18 19 20 21 22 23 24 25 26 27 28 29 30 31 32 33 34 35 36 37 38 39 40 41 42 43 44 45 46 47 48 49 50 51 52 53 54 55 56 57 58 59 60 61 62 63 64 65 66 67 68 69 70 71 72 73 74 75 76 77 78 79 80 81 82 83 84 85 86 87 88 89 90 91 92 93 94 95 96 97 98 99 100 101 102 103 104 105 106 107 108 |
<!DOCTYPE html> <head> <meta charset="utf-8"> <title>D3 Brush Touch</title> <script src="https://d3js.org/d3.v5.min.js"></script> </head> <body> <!-- 1. 選択時のスタイル設定 --> <style> .selected { fill: red; stroke: brown; } </style> <script> // 2. 散布図の表示 var width = 800; // グラフの幅 var height = 600; // グラフの高さ var margin = { "top": 30, "bottom": 30, "right": 30, "left": 30 }; var randomX = d3.randomUniform(0.5, 10); var randomY = d3.randomNormal(0.5, 0.12); var data = d3.range(500).map(function() { return [randomX(), randomY()]; }); var svg = d3.select("body").append("svg").attr("width", width).attr("height", height); g = svg.append("g").attr("transform", "translate(" + margin.left + "," + margin.top + ")"); var xScale = d3.scaleLinear() .domain([0, 10]) .range([0, width - margin.right - margin.left]); var yScale = d3.scaleLinear() .domain([0, 1]) .range([height - margin.bottom - margin.top, 0]); var dot = g.append("g") .attr("fill-opacity", 0.2) .selectAll("circle") .data(data) .enter() .append("circle") .attr("cx", function(d) { return xScale(d[0]) }) .attr("cy", function(d) { return yScale(d[1]) }) .attr("r", 5); svg.append("g") .attr("transform", "translate(" + margin.left + "," + (height - margin.bottom) + ")") .call(d3.axisBottom(xScale)); svg.append("g") .attr("transform", "translate(" + margin.left + "," + margin.top + ")") .call(d3.axisLeft(yScale)); // 3. brushの設定 var brush = d3.brush() .extent([ [0, 0], [width - margin.left - margin.right, height - margin.top - margin.bottom] ]) .on("start brush", brushed) var g2 = g.append("g") .call(brush) .call(brush.move, [ [xScale(2), yScale(0.8)], [xScale(5), yScale(0.3)] ]) .selectAll(".overlay") .each(function(d) { d.type = "selection"; }) .on("mousedown touchstart", brushcentered); function brushed() { var x0 = xScale.invert(d3.event.selection[0][0]); var y1 = yScale.invert(d3.event.selection[0][1]); var x1 = xScale.invert(d3.event.selection[1][0]); var y0 = yScale.invert(d3.event.selection[1][1]); dot.classed("selected", function(d) { return(x0 <= d[0] && d[0] <= x1) && (y0 <= d[1] && d[1] <= y1); } ); } function brushcentered() { var mouse = d3.mouse(this); var dx = xScale(2) - xScale(0); var dy = yScale(0.2) - yScale(0); var x0 = mouse[0] - dx / 2; var x1 = mouse[0] + dx / 2; var y0 = mouse[1] - dy / 2; var y1 = mouse[1] + dy / 2; // var xMax = xScale.range()[1]; var yMax = yScale.range()[0]; var x = x1 > xMax ? [xMax - dx, xMax] : x0 < 0 ? [0, dx] : [x0, x1]; var y = y1 > yMax ? [yMax - dy, yMax] : y0 < 0 ? [0, dy] : [y0, y1]; d3.select(this.parentNode).call(brush.move, [ [x[0], y[1]], [x[1], y[0]] ]); } </script> </body> |
解説
基本的なプログラムは、こちらの範囲選択と同じです。ハイライト部分を解説します。
クリック、タッチ時のイベント設定
|
1 2 3 4 5 6 7 8 9 |
var g2 = g.append("g") .call(brush) .call(brush.move, [ [xScale(2), yScale(0.8)], [xScale(5), yScale(0.3)] ]) .selectAll(".overlay") .each(function(d) { d.type = "selection"; }) .on("mousedown touchstart", brushcentered); |
callメソッドでbrushを設定すると、以下のSVG要素が設定されます。
|
1 2 3 4 5 6 7 8 9 10 11 12 |
<g class="brush" fill="none" pointer-events="all" style="-webkit-tap-highlight-color: rgba(0, 0, 0, 0);"> <rect class="overlay" pointer-events="all" cursor="crosshair" x="0" y="0" width="960" height="500"></rect> <rect class="selection" cursor="move" fill="#777" fill-opacity="0.3" stroke="#fff" shape-rendering="crispEdges" x="112" y="194" width="182" height="83"></rect> <rect class="handle handle--n" cursor="ns-resize" x="107" y="189" width="192" height="10"></rect> <rect class="handle handle--e" cursor="ew-resize" x="289" y="189" width="10" height="93"></rect> <rect class="handle handle--s" cursor="ns-resize" x="107" y="272" width="192" height="10"></rect> <rect class="handle handle--w" cursor="ew-resize" x="107" y="189" width="10" height="93"></rect> <rect class="handle handle--nw" cursor="nwse-resize" x="107" y="189" width="10" height="10"></rect> <rect class="handle handle--ne" cursor="nesw-resize" x="289" y="189" width="10" height="10"></rect> <rect class="handle handle--se" cursor="nwse-resize" x="289" y="272" width="10" height="10"></rect> <rect class="handle handle--sw" cursor="nesw-resize" x="107" y="272" width="10" height="10"></rect> </g> |
選択可能範囲を表す"overlay"をclass属性にもつrect要素にイベントハンドラ(brushcenterd)を設定します。その際、"overlay"のtypeをselectionに変更しておくと、moveメソッドで選択範囲を移動させられるようになります。
クリック、タッチ時のイベントハンドラ
イベントハンドラ(イベント発生時に呼び出される関数)を設定します。
|
1 2 3 4 5 6 7 8 9 10 11 12 13 14 15 16 17 18 19 20 21 |
function brushcentered() { var mouse = d3.mouse(this); var dx = xScale(2) - xScale(0); var dy = yScale(0.2) - yScale(0); var x0 = mouse[0] - dx / 2; var x1 = mouse[0] + dx / 2; var y0 = mouse[1] - dy / 2; var y1 = mouse[1] + dy / 2; // var xMax = xScale.range()[1]; var yMax = yScale.range()[0]; var x = x1 > xMax ? [xMax - dx, xMax] : x0 < 0 ? [0, dx] : [x0, x1]; var y = y1 > yMax ? [yMax - dy, yMax] : y0 < 0 ? [0, dy] : [y0, y1]; d3.select(this.parentNode).call(brush.move, [ [x[0], y[1]], [x[1], y[0]] ]); } |
d3.mouse()はマウスの位置を取得するメソッドで、引数内の要素に対するマウス座標を[x,y]の形で取得します。dx,dyはタッチ時の選択範囲の大きさです。this.parentNodeを選択し、brushを設定した"overlay"の親要素を参照しています。
まとめ
タッチで移動した選択範囲は四隅をドラッグすることで選択範囲を変更できます。
タッチ操作ではドラッグ操作のように範囲選択しづらく、このページで紹介した方法が有効ですが、画面がスクロールしない場合などはこちらの方法が有効で、使い分けが重要です。
