D3.js v4/v5 force simulation 関連ノード/リンクをハイライトする方法
D3のforceSimulationでクリックした要素に関連する要素とリンクをハイライトする方法を紹介します。
本デモは、こちらのデモにクリック時のハイライト機能を加えたものです。コードのハイライト部分のみ説明します。その他の部分はこちらを参照ください。
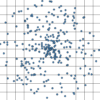
サンプルデモ (ノードをクリックしてください)
サンプルコード
|
1 2 3 4 5 6 7 8 9 10 11 12 13 14 15 16 17 18 19 20 21 22 23 24 25 26 27 28 29 30 31 32 33 34 35 36 37 38 39 40 41 42 43 44 45 46 47 48 49 50 51 52 53 54 55 56 57 58 59 60 61 62 63 64 65 66 67 68 69 70 71 72 73 74 75 76 77 78 79 80 81 82 83 84 85 86 87 88 89 90 91 92 93 94 95 96 97 98 99 100 101 102 103 104 105 106 107 108 109 110 111 112 113 114 115 116 117 118 119 120 121 122 123 124 125 126 127 128 129 130 131 132 133 134 135 136 137 138 139 140 141 142 143 144 145 146 147 148 149 150 151 152 153 154 155 156 157 158 159 |
<!DOCTYPE html> <html> <head> <meta charset="utf-8"> <title>D3 v5 force simulation node click response</title> <!-- 0. スタイル設定 --> <style type="text/css"> .selected { fill: tomato; } .linkSelected { stroke: tomato; } .conected { fill: orange; } </style> </head> <body> <svg width="800" height="600"></svg> <script src="https://d3js.org/d3.v5.min.js"></script> <script> // 1. 描画用のデータ準備 var width = document.querySelector("svg").clientWidth; var height = document.querySelector("svg").clientHeight; var nodeNumber = 30; var nodesData = []; for(var i = 0; i < nodeNumber; i++) { nodesData.push({ "index": i, "x": width * Math.random(), "y": height * Math.random(), "r": 10 }); } var linksData = []; for(var i = 0; i < nodeNumber; i++) { for(var j = i + 1; j < nodeNumber; j++) { if(Math.random() > 0.9) { linksData.push({ "source": i, "target": j, "l": Math.random() * 150 + 5 + nodesData[i].r + nodesData[j].r }); } } } // 2. svg要素を配置 var link = d3.select("svg") .selectAll("line") .data(linksData) .enter() .append("line") .attr("stroke-width", 2) .attr("stroke", "black"); var d3_drag = d3.drag() .on("start", dragstarted) .on("drag", dragged) .on("end", dragended); var node = d3.select("svg") .selectAll("circle") .data(nodesData) .enter() .append("circle") .attr("r", function(d) { return d.r }) .attr("fill", "Gold") .attr("stroke", "black") .call(d3_drag) .on("click", clicked); function clicked(d) { d3.selectAll(".selected").classed("selected", false); d3.selectAll(".conected").classed("conected", false); d3.selectAll("line").classed("linkSelected", false); d3.select(this).classed("selected", true); d3.selectAll("line") .filter(function(v, i) { if(d == v.source) { node.each(function(vj, j) { if(v.target == vj) d3.select(this).classed("conected", true); }); return true; } else if(d == v.target) { node.each(function(vj, j) { if(v.source == vj) d3.select(this).classed("conected", true); }); return true; } }).classed("linkSelected", true); } // 3. forceSimulation設定 var simulation = d3.forceSimulation() .force("link", d3.forceLink() .distance(function(d) { return d.l; }) .iterations(2)) .force("collide", d3.forceCollide() .radius(function(d) { return d.r; }) .strength(0.7) .iterations(2)) .force("charge", d3.forceManyBody().strength(-100)) .force("x", d3.forceX().strength(0.01).x(width / 2)) .force("y", d3.forceY().strength(0.01).y(height / 2)) .force("center", d3.forceCenter(width / 2, height / 2)); simulation .nodes(nodesData) .on("tick", ticked); simulation.force("link") .links(linksData) .id(function(d) { return d.index; }); // 4. forceSimulation 描画更新用関数 function ticked() { link .attr("x1", function(d) { return d.source.x; }) .attr("y1", function(d) { return d.source.y; }) .attr("x2", function(d) { return d.target.x; }) .attr("y2", function(d) { return d.target.y; }); node .attr("cx", function(d) { return d.x; }) .attr("cy", function(d) { return d.y; }); } // 5. ドラッグ時のイベント関数 function dragstarted(d) { if(!d3.event.active) simulation.alphaTarget(0.3).restart(); d3.event.subject.fx = d3.event.subject.x; d3.event.subject.fy = d3.event.subject.y; } function dragged(d) { d3.event.subject.fx = d3.event.x; d3.event.subject.fy = d3.event.y; } function dragended(d) { if(!d3.event.active) simulation.alphaTarget(0); d3.event.subject.fx = null; d3.event.subject.fy = null; } </script> </body> </html> |
解説
0. スタイル設定
|
1 2 3 4 5 6 7 8 9 10 11 12 13 |
<style type="text/css"> .selected { fill: tomato; } .linkSelected { stroke: tomato; } .conected { fill: orange; } </style> |
クリックした際に追加するスタイルを設定しておきます。
2. svg要素を配置 – クリックイベントの登録
|
1 2 3 4 5 6 7 8 9 10 11 12 13 14 15 16 17 18 19 20 21 22 23 24 25 26 |
<em> selection</em>.on("click", clicked); function clicked(d) { d3.selectAll(".selected").classed("selected", false); d3.selectAll(".conected").classed("conected", false); d3.selectAll("line").classed("linkSelected", false); d3.select(this).classed("selected", true); d3.selectAll("line") .filter(function(vi, i) { if(d == vi.source) { node.each(function(vj, j) { if(vi.target == vj) d3.select(this).classed("conected", true); }); return true; } else if(d == vi.target) { node.each(function(vj, j) { if(vi.source == vj) d3.select(this).classed("conected", true); }); return true; } }).classed("linkSelected", true); } |
クリック時のイベントをonメソッドでノード要素に登録します。”click”イベントを登録していますが、タブレットやスマートフォンの”touch”イベントにも自動で対応してくれます。
クリック時のイベント関数では、始めにclassedメソッドを使ってすべてのハイライトを解除します。classedメソッドは、引数にクラス名(※頭に「.」をつけないように注意)と、booleanの二つの引数を取り、falseの際はクラスを解除、trueの際は登録します。trueの際にすでに同じ名前のクラスが登録されている場合は何もしません。
クリックしたノード要素にselectedクラスを追加した後、filterメソッドとeachメソッドを使ってクリックしたノード要素がつながっているリンクとノードを探索してクラスを追加していきます。
まとめ
今回は、解説のためにクリックごとに全要素を探索するアルゴリズムにしていますが、始めにノード用のデータnodesDataにつながっている要素とリンクを配列として登録しておけば計算時間を短縮することができます。また、d3.dragもそうですが、自動的にタッチパネルに対応してくれています。forceSimulationの使い方はこちらを参照ください。


